Thursday, November 24, 2011

Caramel Apple Pie

I have had several requests for this recipe, so I'll post it here.  Best.Pie.Ever!
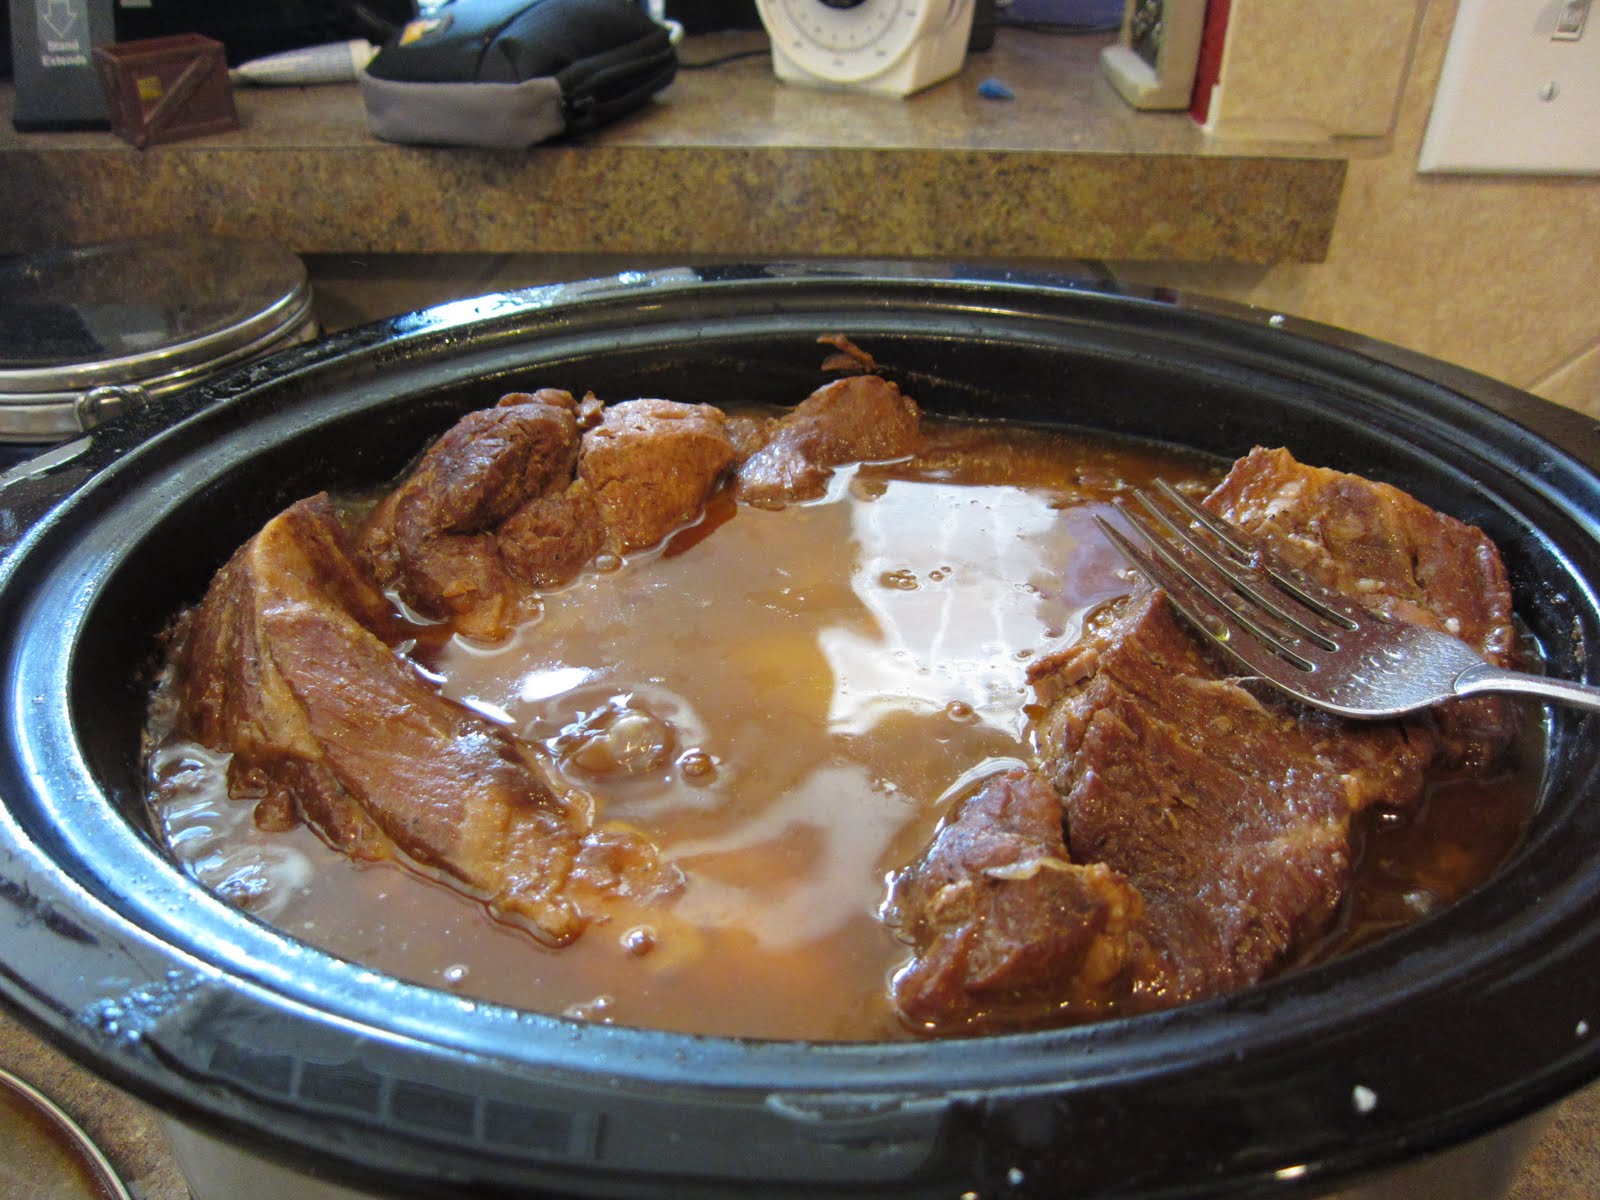
*This recipe is for the apple pie, not the chocolate!

Before I begin, this recipe is compliments of the Food Network, and the original can be found here, Also, I don't make my own crust (blasphemy, I know), but use the Pillsbury premade crusts from the refrigerated section in the grocery store.  It just saves time.  If you make this pie ahead of time, hold off on making the caramel until shortly before you serve the pie.  It is so much better that way!


Ingredients


Pie Dough, recipe below

7 large Granny Smith or Pippin apples, peeled and cored

1 cup sugar

3 tablespoons quick-cooking tapioca

1 teaspoon ground cinnamon

1/2 teaspoon salt

Juice of 1/2 lemon

1 tablespoon heavy cream

1 large egg

Caramel topping, recipe follows

Directions

Butter and flour a 9-inch glass pie plate. On a lightly floured surface roll the dough to a 12-inch round about 1/8-inch thick. Line the pie plate, being sure to press the dough into the bottom and up the sides without stretching. Chill 30 minutes. Roughly chop the apples into small pieces, about the size of lima beans. (The apples should measure about 9 cups chopped.) Combine with the sugar, tapioca, cinnamon, salt and lemon juice in a large bowl. Set aside until the juices begin to run, about 10 - 15 minutes. Beat together the cream and egg to make a glaze and brush over the edges and bottom of the crust. Mound the apple filling in the pie shell. It will be quite full. Roll out the remaining dough to a large round about 1/8'' thick. Place over the filling a seal the edges together by gently pressing together. Trim any excess dough with scissors and flute the edges. Brush the top with the remaining egg glaze. Using a paring knife, cut out and remove a circle the size of a quarter from the center of the top crust. Cut 5 or 6 slits in a spoke pattern beginning 1/2-inch from the center hole and ending 1/2-inch from the outside edge. Chill for 30 minutes before baking.


Preheat oven to 425 degrees. Place the pie plate on a cookie sheet and bake 10 - 15 minutes, or until the top is golden brown. Reduce the heat to 300 degrees and continue baking until the juice visible in the center becomes thick and bubbly, about 1 hour (if the edges are browning too quickly, cover with aluminum foil). Meanwhile prepare the caramel topping. Spoon the hot caramel over the top of the pie to coat and return to the oven. Bake 5 minutes longer, or until the caramel sets. Cool on a rack before serving.


CARAMEL TOPPING

1/2 cup packed brown sugar

4 tablespoons unsalted butter

2 tablespoons heavy cream

1/2 cup pecan halves

In a small saucepan combine brown sugar, butter and cream. Bring to a boil and cook for 2 minutes. Remove from the heat and stir in the pecan halves.


PIE DOUGH

2 cups all-purpose flour

1/2 cup lard

2 1/2 tablespoons unsalted butter

1/2 teaspoon salt

About 1/2 cup iced water

In a large bowl combine the flour with the lard, butter and salt. Mix lightly with your fingertips until the dough forms grape-sized pieces. You should be able to see chunks of fat. Stir in the iced water. Lightly knead, handling the dough as little as possible, until the dough forms a ball. Add a little more iced water if necessary. Transfer to a plastic bag and shape into a log. Seal the bag, pressing out any air, and chill for as little as 1 hour or as long as 3 days. The pie dough can be frozen for as long as a week.

Thursday, August 4, 2011

Inspiration

Inspiration comes in many forms, and in times like these when the world seems to be spiralling faster and faster out of control I think we need it more than ever.  I've been in a bit of a creative rut lately, and definitely in need of some inspiration.  I found it yesterday over sushi with one of my favorite former students.

I had the pleasure of having Jarred in my class for two and a half years, and his classes were always my favorite.  Jarred is a great kid; he is intelligent, thoughtful, creative, compassionate, and understanding.  He sees the world in a different way than most people I know, especially most teenagers.  When you talk to Jarred about the world, he makes statements that make you stop and think.  Even just talking about going off to college, and all the things that are different about where he is headed, Tulane University in New Orleans, are thought-provoking.  Jarred doesn't pretend to understand everything, because he has a passion to learn what he can about all the places he encounters.  He is majoring in International Relations, and has big plans; he may never graduate because he wants to study abroad in a million different places just to be able to explore their cultures.  We talked about school, a little about the future, and a lot about what he learned in high school about life.  But, the best thing about talking to Jarred is that we can carry on a conversation that doesn't revolve around pop culture.  His fresh look on things was exactly what I needed to get it together for the coming year.  The knowledge that you should never stop learning, never stop aiming for something higher, and never give up on your dreams was something I needed to be reminded of.  Thank you, Jarred.  You are a star.  (And your mom is right, you should take some vocal coaching, but for radio and speech, not music!)

Wednesday, August 3, 2011

Kitchen Adventures

The last couple of weeks have been full of cooking, baking and eating.  I like it that way.  I like eating.  My waist does not, but that is beside the point.

Shortly following my adventure with cinnamon rolls (I have learned that the dough must be refridgerated for at least 3 days before even attempting to roll, regardless of what the recipe says), I made two large chocolate sheet cakes, and a gigantic Dr Pepper pulled pork, both of which are deliciously yummy.  I was particularly proud of my pulled pork, as I have never attempted anything like it before, and it was met with glowing reviews!  Yay!  The chocolate cake was pretty easy; I realized towards the end of the process that I had almost this identical recipe under a different name.  Regardless of how easy it was to make, and having basically done it before countless times, it was still delicious!  So, since these recipes turned out so well for me, I thought I should share the recipes with you, along with some pictures of the process.

Dr Pepper Pulled Pork - from The Pioneer Woman
My sister made this for us when we were up in Minnesota for Easter this year, and it was great.  When my grandpa's birthday rolled around I took on the task of making the pulled pork while my most awesome Aunt Nancy pulled together all the fixins for some wonderful pulled pork tacos. 

I started with two large pork shoulders, bone-in, totalling a little over 7lbs.  The grocery store was out of boneless, so I was stuck with bone-in, which made it a little difficult to shred since it was falling off the bone, it also made it more difficult to cook in my crock-pot. 

The recipe calls for a can of chipotle peppers, which I skipped and used barbeque sauce instead.  If you do this, find a spicy barbeque sauce, the one I used was too sweet, so the meat didn't have a tang at all, but it was still wonderful!  The crock-pot is lined with onion pieces, and the meat is covered with salt and pepper, Dr Pepper, brown sugar, and the barbeque sauce.  Then just turn the crock-pot on and let it cook!  I should note, the recipe cooks in the oven, but I used my crock-pot.  It cooked in about the same amount of time, but crock-pot.com has a meat cooking guide if you use a different amount of meat.  It also says you need to flip the meat occassionally, which I did every two hours, but I don't know that it was actually necessary in the crock-pot.


Once it was cooked, it took a while to shred, since there was so much of it!  As I mentioned before, it was a bit difficult to get out of the pot, but it was totally worth it!  Word of advice, invest in a skimmer, it was really difficult to seperate the fat from the juice, and you want to keep the juice!


My aunt is a genius, and had three kinds of cheese prepared: cheddar, quesadilla mix, and cojita, along with fresh tomatos, peppers, cilantro, quacaole and tomatilla sauce, and perfect flour tortillas.  I also made some of the leftover meat into nachos for the next couple of days.

Official Recipe:
Spicy Dr Pepper Shredded Pork

Ingredients

1 whole Large Onion
1 whole Pork Shoulder ("pork Butt") - 5 To 7 Pounds
Salt And Freshly Ground Black Pepper
1 can (11 Ounce) Chipotle Peppers In Adobo Sauce
2 cans Dr. Pepper
2 Tablespoons Brown Sugar

Preparation Instructions:
Preheat oven to 300 degrees.  (Remember, I used a crock-pot set to high)
Peel the onion and cut it into wedges. Lay them in the bottom of a large dutch oven.
Generously salt and pepper the pork roast, then set it on top of the onions in the pan.
Pour the can of chipotle peppers over the pork (include the sauce.) Pour in both cans of Dr Pepper. Add brown sugar to the juice and stir in.
Place lid tightly on pot, then set pot in the oven. Cook for at least six hours, turning roast two or three times during the cooking process. Check meat after six hours; it should be absolutely falling apart (use two forks to test.) If it's not falling apart, return to the oven for another hour.
Remove meat from pot and place on a cutting board or other work surface. Use two forks to shred meat, discarding large pieces of fat. Strain as much of the fat off the top of the cooking liquid as you can and discard it. Return the shredded meat to the cooking liquid, and keep warm until ready to serve. (You can also refrigerate the meat and liquid separately, then remove hardened fat once it's cold. Then heat up the liquid on the stovetop and return the meat to the liquid to warm up.
Serve on warm flour tortillas. Top with shredded lettuce, diced tomatoes, grated cheese, avocado slices, salsa, and whatever else you'd like.

The recipe link has much better pictures!

Chocolate Sheet Cake - also from The Pioneer Woman, but this recipe can also be found as Dr Pepper Cake, Coca-Cola Cake, Texas Sheet Cake, etc.  I've seen it a million times, with basically the only change being what liquid you add to the cocoa and butter.

I made a double recipe of this cake, one for my grandpa and one for my father-in-law.  This cake is really easy to make, and really, really moist.  My secret ingredient is using Hershey's Special Dark Cocoa Powder rather than regular cocoa powder.  It makes the cake extra decadent, especially served warm with vanilla bean ice cream.
Like I said before, I realized I had made this cake before.  I had discovered the Dr Pepper Cake recipe a few years ago and it had become one of my staple cakes.  I prefer it to this version, especially when using Cherry Dr Pepper.  But, this one was very good too!  This version of the recipe calls for it to be cooked in an 18x13" baking sheet or jelly roll pan.  I prefer it to be thicker, so I used standard cake pans.  That changes the cooking time to 25-30 minutes rather than 20.  Rather than mixing the pecans into the icing, I just sprinkled them on the top.

Serve warm with ice cream and you are golden!


Ree's Recipe from The Pioneer Woman Blog

Thursday, July 21, 2011

Cinnamon Rolls = Messiest My Kitchen Has Ever Been

A few months ago my mother-in-law gave me a cookbook, The Pioneer Woman Cooks.  It is a beautiful book, filled with recipes that make my jeans tighter just from thinking about cooking any of them.  As my mother-in-law just celebrated a birthday, she requested that I make the cinnamon rolls out of the cookbook for our family birthday celebration.  I'm not sure what I just finished cooking, but I assure you that it is not a batch of beautiful cinnamon rolls...it is mostly a big gooey mess.  I should also mention that my mother-in-law has a gluten allergy, so these were made with gluten-free flour.

I should have had a clue that things would not go so well.  Every cake or bread recipe I make that says to use a medium saucepan misleads me, and you would think I would have learned my lesson.  After mixing 4 cups of milk, a cup of oil, and a cup of sugar together, adding yeast, and then somehow squeezing eight cups of flour into the pan, it was already filled to the top...did it occur to me that the dough would actually rise?  No, even though I knew it was going to do so, I just didn't think about it.  So, after about 20 minutes the dough is spilling over the top of the pan and I have to transfer it to a larger bowl, thus probably damaging the entire yeast/rise process.  Oops.  Now, the recipe makes about 50 cinnamon rolls, so I only rolled/baked half of the dough tonight.  According to the recipe you can roll it out as soon as it has risen for an hour.  Wrong!  I put my dough out on my prepared surface (I used painter's tape to tape saran wrap onto my counter!), it just spread out and stuck to everything, no rolling out at all.  So, I used a spatula to scoop it back into the bowl and stuck the whole batch in my fridge for a couple of hours.  Should have left it there overnight, but I really wanted to eat one tonight! I'm hoping that after the rest of the dough chills overnight it will be firm enough to actually roll once the filling is spread on the dough.  As it was, even after a couple of hours of firming up, this first batch rolled out just fine, but would simply not roll up once I added the filling, regardless of the amount of flour I tried to use, and I only get it to sort of squish together into a long, gooey mess of a lump.  I then used a cookie dough scoop to plop the "rolls" into the pie plates like scones.  The entire process was hilarious, as my husband can certainly confirm, and our entire kitchen was covered in flour, and almost all of my baking equipment was dirty (Chris lovingly did the dishes).

Messy, messy, messy...they aren't actually that yellow, but Chris took this with his phone.

The "rolls" just came out of the oven, and what I have is basically a pie plate with some sort of dough in it, but there are no defined rolls.  I could sort of see the line where the scoops of dough met, so I just took a knife and cut around them so that the icing, which is delicious, had somewhere to go.  They are cooling now, but I'm about to eat one, even though it is almost 11:00...

And the verdict: Pretty delicious.  I can tell that they are made with gluten-free flour, as the texture is a little different and there is a bit of a taste that I can't quite place.  But, they are moist and light, and not too sweet.  Even though they don't look pretty, they taste great!  Yay! 

Freshly Baked Cinnamon "Rolls"


Even better with a cup of coffee!

For anyone interested in the recipe, here it is: Pioneer Woman's Cinnamon Rolls.  I wish I had found this recipe on the website, rather than in the cookbook, it is much clearer online!

Wednesday, July 20, 2011

Summer, where are you going?

I refuse to believe that summer is more than half over, but I fear I have to acknowledge that my free days are limited.  We have been so busy, I sort of feel like I missed all of June and most of July, only to wake up and realize how much had already happened.  It just isn't fair.

Connor is growing and growing; physically and mentally.  The poor kid is still short and skinny though, still wearing a 12month size in his shorts and swim trunks, but is getting a little taller.  Hopefully he will miss my short gene.  Intellectually he is incredible!  In just the past couple of weeks he has become quite the conversation artist.  He can carry on a pretty clear conversation with anyone, and has a memory that shocks us all.  Yesterday we were playing in the living room and Dino Dan was on in the background.  A dinosaur roared and I said something about it to Connor, who looked at me in complete seriousness and said, "No Mommy, not Dinosaur, Tyrannosaurus."  The kid is smart. 

Connor was able to spend a week with Mimi and Pa while Chris and I took a vacation with friends.  I believe his favorite part of the week was going to Floydada and getting to drive the riding lawnmover and ride in the Combine.  His Pa and Pop Pop had a good time with that as well!  He was also quite impressed that Pop Pop and Granny have a Raider Red statue that is bigger than he is.  We brought him a toy guitar back from our cruise and he plays it non-stop, though he discovered that if he puts cereal in the hole it is difficult to get out.  We missed him like crazy while we were gone; kept seeing little kids around our cruise ship that were about his age, but it was nice to be able to have some adult time again, and it was great getting to see him when we got back!


Connor also started swimming lessons this week, and is doing alright.  He is the youngest in his class, and is a bit timid, but he does really well when he wants to!  We are working on our "scoops" and kicks.  He does each one idependently pretty well, but putting them together is not something he is interested in.  Walking like a monkey on the wall of the pool is only an acceptable activity if it is getting him somewhere he wants to go in the pool, and jumping in doesn't hold much appeal (I'm totally okay with that!).  However, he is a bubble-blowing champ!  I can't believe we only have a handful of days left to play together!

Like I mentioned before, Chris and I just got back from vacation.  We took a 7-night cruise on the Norwegian Spirit out of New Orleans with our best friends, Kathy and Chris Vance.  We had a great time, and were able to see some Mayan ruins and go cave tubing, and we had fantastic weather the whole time we were gone.  But, we didn't escape rain completely, it poured on us while we were walking around New Orleans on Sunday before our flight home.  I'll write a seperate blog about our cruise later, as soon as I finally write one about the Disney trip, but as a preview I will say that I definitely prefer Royal Caribbean to Norwegian.  The itinerary was great, but the cruise experience itself wasn't as nice as we have experienced on Royal or on Disney. 


The next couple of weeks are a bit crazy as well, with family birthdays, more swim lessons, staff development starting, and trying to fit in lots of lunch dates with graduated seniors before they head off to college.  But, I am determined to enjoy what is left of summer! 

TTFN!

Sunday, July 3, 2011

First (and Second) Haircuts at Magic Kingdom's Harmony Barber Shop

First haircuts are a special event in our society, and what better way to celebrate the occasion than a special trip to Walt Disney World to have your little ones first haircut at Magic Kingdom's Harmony Barber Shop!  Now, granted this makes for one expensive haircut...but, if you are planning a trip anyway, why not?!

My son, Connor, was born with a lot of hair, and everyone expected us to cut it long before he turned one, but I had always wanted the Magic Kingdom first haircut, so we just kept letting it grow in hopes that something affordable would come along that could get us to WDW before we couldn't put the cut off any longer.  Luckily, something did, and in November of 2010 we made a Thanksgiving week trip to Orlando along with my parents. (If you can get grandparents to go on your first family trip it is a BLESSING!).  We made Connor's haircut appointment about a week before our trip by calling 407-WDISNEY, and that was that!  We had our appointment for our first morning there with no problems making the reservation at all.  

We headed to Magic Kingdom early that morning to get in a few rides and enjoy our first trip with Connor prior to our haircut.  Magic Kingdom was pretty empty, which made for a great stroll down Main Street; U.S.A, and no wait on Dumbo the Flying Elephant, (of course Dumbo had to be his first ride).  Then we headed to Harmony Barber Shop, which is located on Main Street between the Emporium and the Fire Station.  It is tucked away into a little corner, and just screams nostalgia when you see it.  Such a sweet place!  There are three barber's chairs located inside, as well as an L-shaped bench to wait on and a small cash register.  The wall shelves are filled with First Haircut Mickey ears, Mickey hair glitter, colored hair gels, as well as more traditional barber shop odds and ends.


We only had to wait about 5 minutes for our appointment, and then Connor was introduced to Rex, who would be cutting his hair.  Rex was wonderful!  He gave Connor a bunch of stickers, and then assisted Connor in sticking the Mickey stickers all over himself.  When Connor was thoroughly occupied he sprayed Connor's hair down and got to work, and never minded when Connor got wiggly.  (Harmony Barber Shop is not equipped to wash hair, so arrive with your kiddos already clean).  Rex chatted easily with us as we watched, never minded the four people with various cameras in a clearly small space, was great at distracting Connor with stickers and light chasers; the man has the patience of a saint and he was just a wonderful man.  He made the experience such a joy, and so completely worth the trip!  When he was finished Connor looked like a little boy, not my baby!  He was presented with his special First Haircut Mickey Mouse Ears, and a certificate from the barber shop.  The whole package was right around $20.00, and included the ears and certificate.  Probably one of the best bargains on Disney property.  It was such a special experience for all of us, and I am so glad we waited to get his first cut at Disney.  It is a memory I will cherish always.


In June of this year I brought 29 teenage theatre students to Disney to participate in Disney Performing Arts and Y.E.S workshops, and of course had to bring Connor along too!  Since October he has had four additional haircuts, and was due for another.  We had an equally enjoyable experience with Harmony Barber Shop the second time around.  Our stylist in June was Beverlene, and she was just as wonderful as Rex.  Connor sat perfectly still this time around, as he is now a pro at getting his hair cut.  The cost for the cut was less than $20, which is the same as pay for a kids cut around here anyway.  No ears this time, but stickers galore!  I don't think we will ever make it to Disney again without getting Connor's hair cut while we are there!


Next time you are planning a trip, consider Harmony Barber Shop for a special haircut.  They do first haircuts, kids cuts, and adult cuts too!  Prices are really reasonable, and it is a whole lot of fun!

Friday, July 1, 2011

“Food Network Challenge: Star Wars Cakes” This Weekend


*Reposted from The Disney Food Blog, one of my favorite places for Disney Dining information!  This post combines several of my favorite things: Star Wars, Disney, Food Network Challenge and Cake!

“Food Network Challenge: Star Wars Cakes” This Weekend

Celebrating the grand reopening of Disney’s Star Tours attraction that debuted in May, The Food Network will showcase a new episode of Food Network Challenge – “Star Wars Cakes”!
Using The Force to shield the Dark Side, four cake artists will face off in this galactic battle to re-create Star Wars cakes. Beware of Jedi mind tricks! Will a sensory distraction such as the smell of WDW caramel corn be unleashed?


The challenger that presents an epic cake wins $10,000 and a trip to the Walt Disney World Resort in Orlando, Florida. (Lucky ducks.)
Set your coordinates for one of these showings (Eastern Time Zone):
July 3 at 8:00 PM
July 4, 2011 3:00 AM
July 4, 2011 11:00 PM
*End repost*
I was able to try the above pictured cupcake during our recent June trip, and let me tell you, it was DELICIOUS!  The cupcake was basically a Devil's Food, but had gooey peanut butter and chocolate throughout.  The peanut butter was incredible!  The icing was very thick, and had a nice mellow chocolate flavor that didn't overpower the cupcake itself, and the Darth Vader medallion on the top was made of white chocolate.  I can't comment on that part, as I don't like white chocolate so I didn't eat it.  This cupcake was also gigantic; I shared it with my husband and we still didn't finish it.
Thanks for reading!
Lin

Thursday, June 30, 2011

Cars Land Virtual Drive-Through at Disney California Adventure Park

*Repost from Disney Parks Blog*  This is just too neat not to share!

Can’t wait to take a stroll through Radiator Springs? If the opening of Cars Land at Disney California Adventure park next year has you ready to cruise past Mater’s Junkyard Jamboree and Luigi’s Flying Tires, then you don’t want to miss this video. It takes you on a virtual drive-through of Cars Land, giving you an idea of what it will look like when it opens in 2012.


Saturday, June 25, 2011

Dine with an Imagineer at Walt Disney World Resort

After countless trips to the Happiest Place on Earth, I finally had the opportunity to participate in Disney's Dine with an Imagineer program at the Walt Disney World Resort in Florida!  The program, which includes a 4-course meal at either The Hollywood Brown Derby at Disney's Hollywood Studios, or The Flying Fish Cafe at Disney's Boardwalk Resort, commemorative gifts, and, of course, lunch or dinner with a working Disney Imagineer, is without comparison.  While a bit pricey, around $75 total for adults, I found it to be worth every penny!  The experience is made particularly special by the intimate atmosphere of the event.  Reservations are made for no more than 8 guests, plus the Imagineer, and it takes place in a private room within the restaurant itself; at the Hollywood Brown Derby we were seated in the Bamboo Room, which is usually reserved for visiting dignitaries and celebrities.  My personal experience was particularly memorable, as I was able to dine with my husband and five of my technical theatre students.

At check-in we were given engraved name tags to wear during the event, and keep as a souvenir.  After a few minutes we were greeted by one of the hosts, given a tour of the restaurant with a brief speech about its history (pictures in gold frames came from the original Hollywood Brown Derby), and let to our room where we were introduced to our Imagineer.

My name tag


Our Imagineer was Sarah Matthews, Associate Graphic Designer, and responsible primarily for print collateral.  Rather than tell you all about her, I have included the bio that was included with our event program at the end of this post.  She was very personable, and it was a wonderful experience speaking with her.  She is currently working on the Aulani project, and it was fascinating listening to her discuss what all she gets to do on the print collateral for a project.  The print collateral department is responsible for selecting the font, verbiage, color, paper weight and texture, the logos, and anything else you can think of.  Next time you step into a WDW Resort room, take a look at all the print collateral around the room; everything from the Environmentality card to the resort maps is the responsibility of the print collateral team to design, and produce.  Of course, they are also responsible for the print materials for special events, restaurants, other Disney properties, and more as well. 

I'll admit, at first I was a little bit disappointed when I saw "graphic designer", and "print collateral" listed, as I have a deep interest in the more theatrical aspects of Walt Disney Imagineering, but Sarah was great.  She was engaging, and friendly.  She was not at all irritated that five members of our seven member group were high school students, and offered them a lot of advice on college and career pursuits; as she started with Disney as a college program intern herself.  She easily chatted with them, and listened patiently when they would get a bit off topic.  As I teach a unit on Imagineering in my technical theatre classes, my students have a basic understanding of what goes into Imagineering projects, so they had some great questions which Sarah did her best to answer.  For example, they asked what a typical day in Imagineering entailed for her.  Sarah stated that she is very lucky, and that due to the nature of her day she gets to work a traditional 9-5 schedule for the majority of the year.  She spends the first portion of her day answering emails, and then spends the remainder in meetings with project staff and working at her computer on design work.  Other Imagineers in her division work a lot of evening hours doing signage installations throughout the parks.  Two of my students have an interest in publicity design, and they were particularly interested in how much thought goes into the design of logos, the picking out of papers, colors and fonts, and the time spent putting it all together.  She also brought along her Imagineering hardhat and let them all try it on and take pictures.  Sarah was excited to tell us that in addition to her work on Aulani, she is also currently designing her own set of Vinylmation figurines, and they should be out this fall.  While not a Vinylmation collector myself, I might have to hunt her set down anyway. 

Lunch was fabulous, and included a soup course, salad course, main course and dessert.  The soup and salad courses are a set menu, but one of my students does not eat bacon and they happily brought her a different soup that did not contain bacon. 

Personalized Lunch Menu:


The corn chowder was delicious, and I had to be careful not to eat too much.  The ancho-chili oil had just a hint of spice to round out the flavors in the soup.  The Cobb Salad was wonderful, and it was beautiful!  Each salad either had a flower, bird or swan carved out of vegetables, and they were almost too pretty to eat.  As for entrees, I had the steak, and it was melt-in-your-mouth wonderful.  The truffle potatoes were incredibly rich and smooth, and the wine reduction sauce was not too strong.  My husband had the grouper, and thought it was fantastic, and one of my students tried the noodle bowl and enjoyed it as well.  I know that the grapefruit cake is the signature dessert at The Hollywood Brown Derby, but most of us tried the creme brulee.  In true creme brulee form it was delicious.  The consistency was perfectly creamy without being too sweet or thick.  The biscotti was great  dipped in my coffee!  A couple of the kids tried the grapefruit cake, and I had a small bite.  It was good, not too sweet or too tart.  However, the texture of the cake was a bit dry for me.  I have included pictures of the food below for those of you who care to see them, though somehow I do not have a picture of the soup or the creme brulee.

Cobb Salad

Char-Grilled Fillet of Beef

Brown Butter, Almond-Crusted Black Grouper

Noodle Bowl with Grilled Breast of Chicken

Grapefruit Cake


At the conclusion of the event, which last about 2.5 hours, we were presented with a program that included a group photo, and a gorgeous clear glass plate with Sorcerer Mickey, the icon of Walt Disney Imagineering.  Sarah signed both the plates and the programs.  It was really neat, because this was her first luncheon after returning from maternity leave, and they had not been doing the photo and program prior to that.  She asked for a copy as well and had each of us sign it so she could put it in her office.  It was really nice, as she told us it was the most relaxed and enjoyable Imagineering lunch she had had as part of the program, and that everyone knowing one another and not being afraid to ask questions made the event relaxed and friendly.

Event program with group photo


Beautiful keepsake plate.  I don't know why it is sideways...it isn't like that on my computer.


I would recommend this program to anyone with an interest in how the parks are developed and maintained.  It was highly enjoyable, and each time you participate you will be getting a different experience, as the Imagineers sign up for the program so you will most likely have a different Imagineer each time.  I plan on making a reservation for our next trip as well! 

For reservations call 407-WDW-DINE, visit Disney's Online Dining Reservations page for this event, or contact your travel agent.